Hello my dear readers recently I have tried that how to publish any epaper or emagazine in your website or blog for free. I have looked certain ways but that was neither good nor freely available.
Then I tried Google Drive and found that how easily we can publish any epaper or emagazine to website or blog. After reading the whole post below you'll find that how easily you'll be able to publish your epaper or emagazine.
This post is very helpful those who has print magazine or paper and want to publish online in their website or blog.
In this post I am going to share that how you can publish any epaper or emagazine to your website or blog.
Please follow the steps below:
Step 1: Login to Google Drive
In this first step login to Google Drive with your Google mail id and then click to Create button on the left. After clicking Create button a small popup box will appear and then click to Simplebooklet apps icon. If don't find the Simplebooklet there in the box then click on Connect more apps link bottom of the box and search for Simplebooklet and click on that. See image below:
Step 2: Login to Simplebooklet
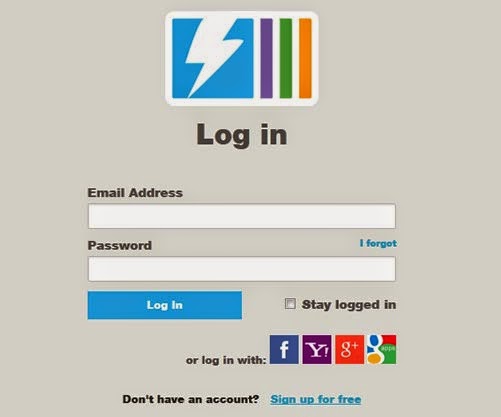
After clicking to Simplebooklet in step 1 you'll navigate to Simplebooklet login page, but before that it will prompt you for permission to access your Google drive account for first time. After you grant access you'll navigate to login page where you'll have to enter email id and password because you are using Simplebooklet first time so you need to signup first then you are able to enter email and password. See image below:
Step 3: Create epaper or emagazine
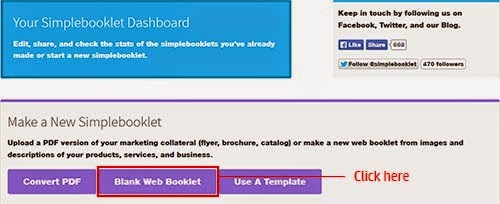
After login to Simplebooklet you'll navigate to Simplebooklet Dashboard page where you'll create new blank web booklet. See image below:
Step 4: Select a document
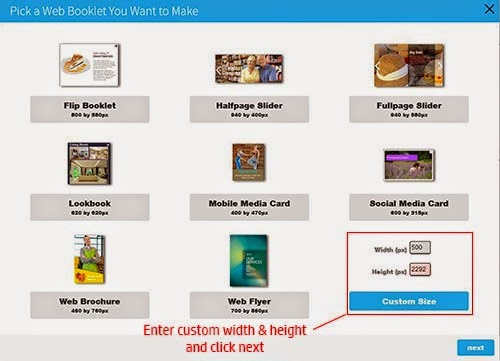
After clicking to Blank Web Booklet in step 3 you'll navigate to the page where you have to select the document type. In this page you'll see multiple options are available to select. You can select any option as per your need but here I have selected custom size and click next button. See image below:
Step 5: Name your Simplebooklet
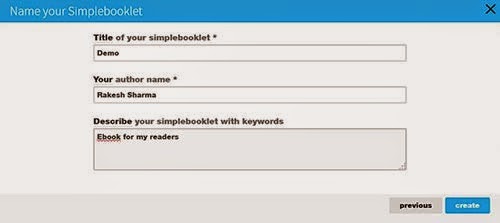
In this step you have to enter some information about your ebook or emagazine like Title / Author / Description. See image below:
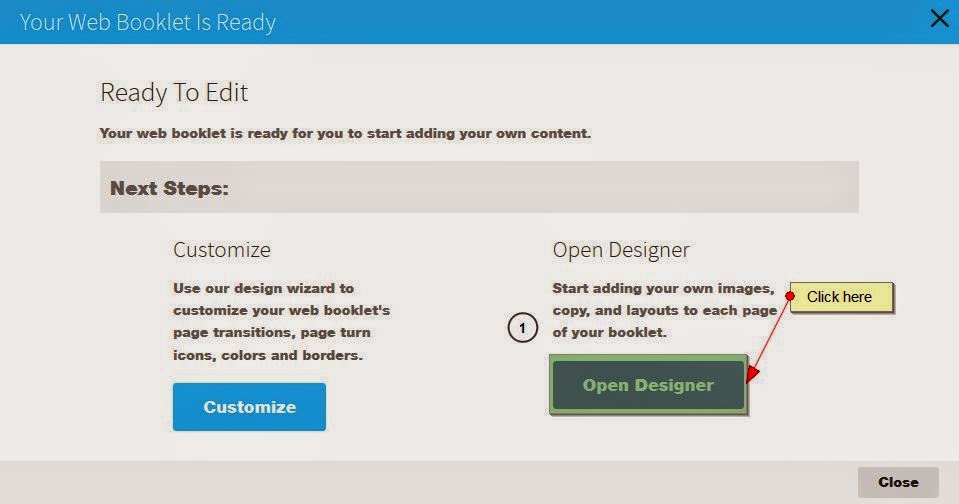
Step 6: Ready to Edit
In this step select the method you want to opt out. You can choose customize or Open Designer as per your requirement. Here I have selected Open Designer. See image below:
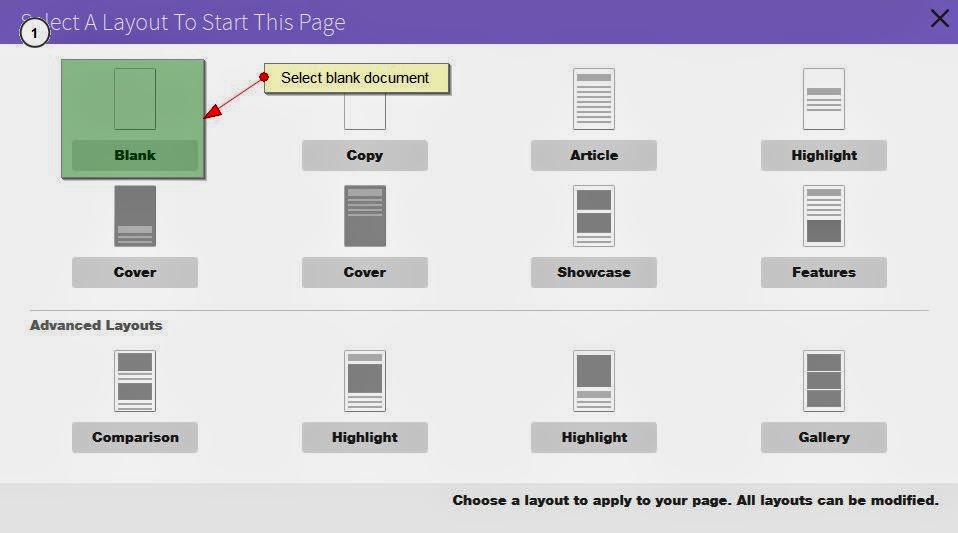
Step 7: Select Layout To Start This Page
In this step select the layout you want to use. Here I have selected Blank Layout. All layouts can be modified. See image below:
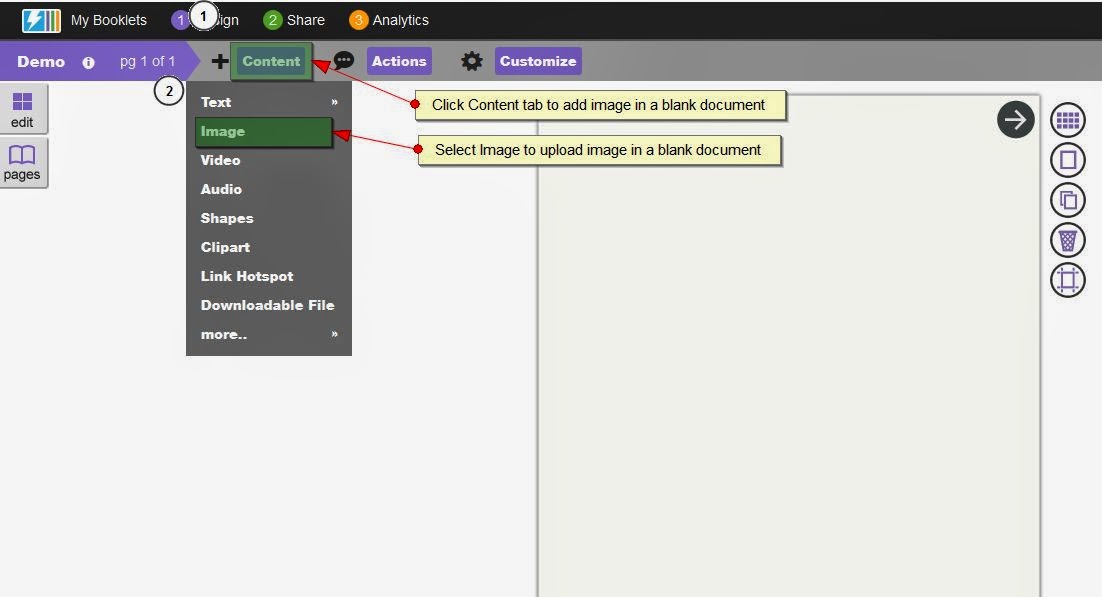
Step 8: Select The Content You Want To Add
In this step add the content to your blank document by clicking Content tab on top left and then click on image link to upload the image to your blank document. See example below:
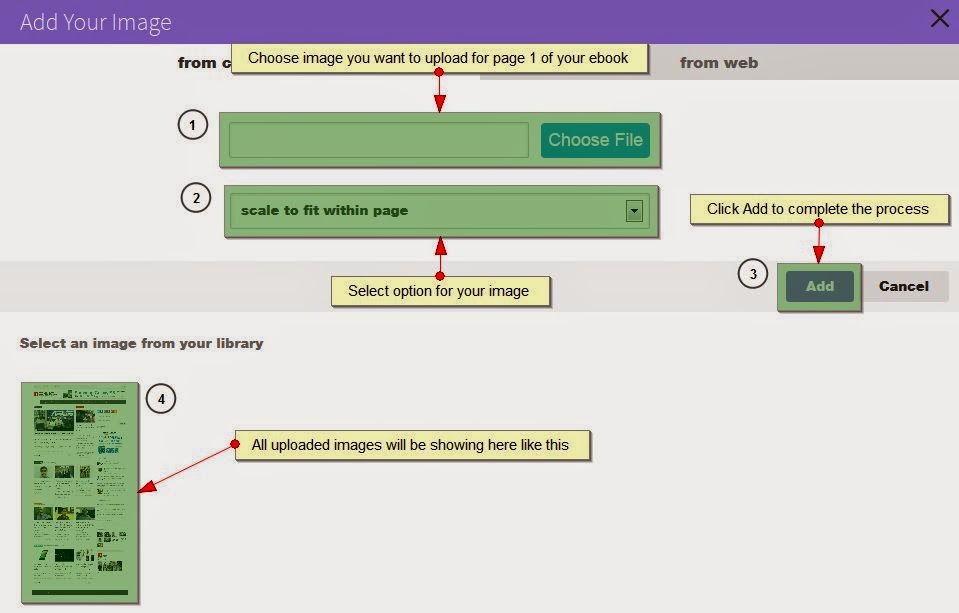
Step 10: Add Your Image
After clicking on the image link in step 9 you'll navigate to the next page where you have to upload your image and click to Add button to proceed to next step. Refer the example below:
Step 11: Adjust Image In Layout
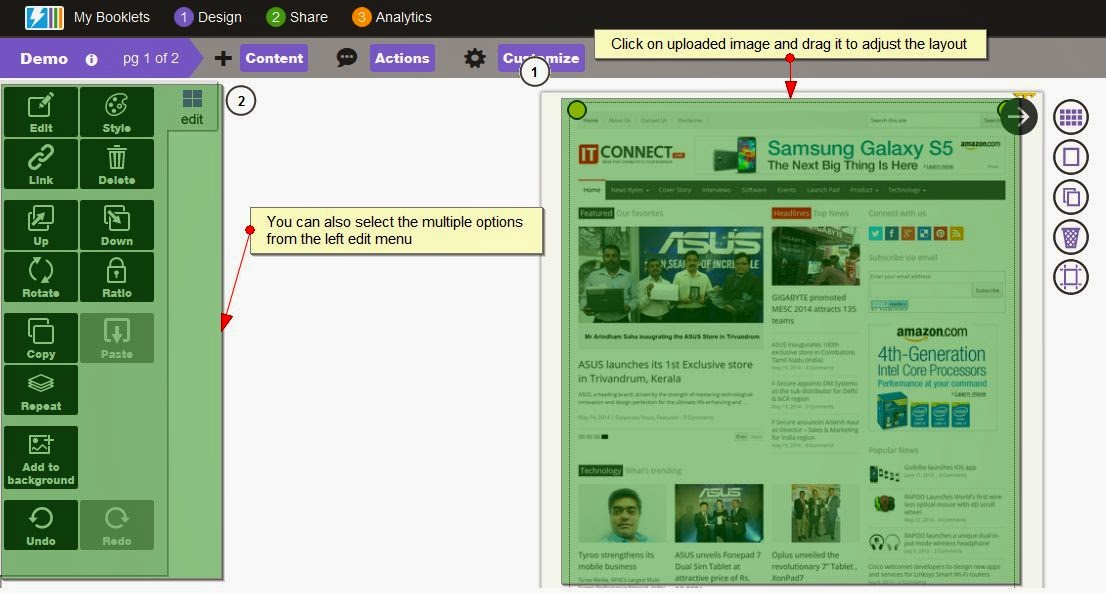
After your image is being uploaded click on the image and you'll get the image edit options on the left or you can drag the image and adjust it in your layout by dragging or edit it. See image below:
Step 12: Add New Page
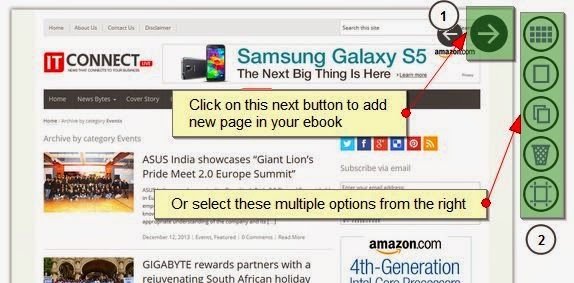
In this step click on the top right arrow on the document or options on the right of the document to add another new page of your epaper or emagazine. See image below:
Step 13: Preview and Publish
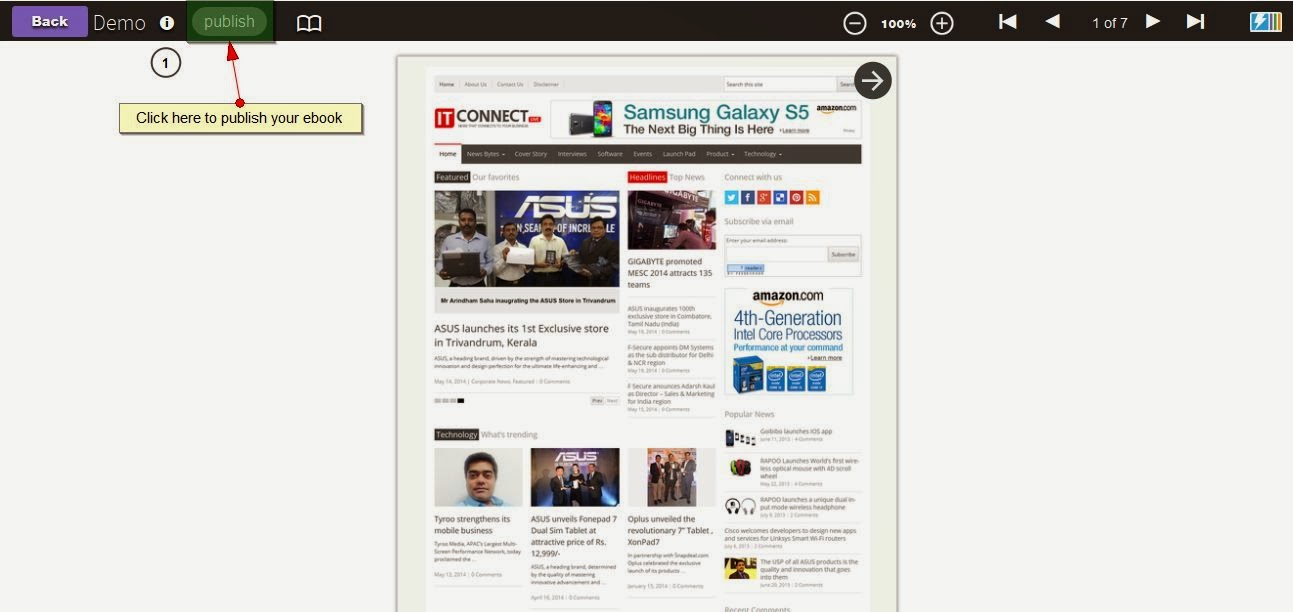
After adding all pages to your document click on preview button on the top left once you are satisfied then click on publish button to publish your web booklet. see image below:
Step 13: Embed In Your Website Or Blog
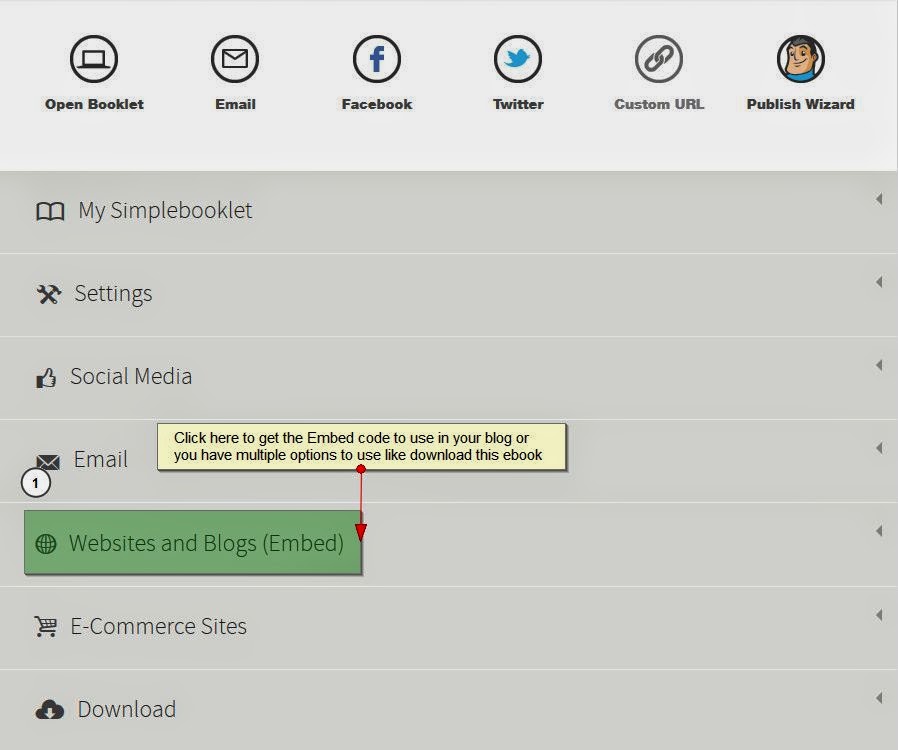
After publishing click on the share button on top left and you'll get the multiple options to choose where you can select Website and Blog Embed option to get the embed code for your website or blog. see image below:
Now you are done. You can see my demo page below:
This Simplebooklet app is free for first 14 days after that you can upgrade your free account to paid one and that is very cheaper as single user.
I hope above tutorial would be helpful for you. If you have any question please leave comment below and share this post in your social network.


2 comments :
hopefully useful and thanks a lot
Post a Comment